Planting trees is great for so many reasons. Importantly, it helps the environment and helps to produce trees which store carbon dioxide, assisting in the fight against climate change. Something that might be more prevalent to us in bonsai, though, is that it gives us trees to develop into bonsai! Whether it’s yamadori (collecting trees from the wild), taking cuttings of trees, sowing seeds or air layering thick branches, there are numerous ways we can plant trees. So when is the best time to plant a bonsai tree?
Although it may take years for a tree to grow into something you can use for bonsai, it’s still worth it. The best time to plant a tree is now, so stop putting it off! In this article, I’ll explain how you can produce a tree for bonsai.

How to Plant a Bonsai Tree
Many trees can be turned into bonsai as long as they have suitable characteristics. These characteristics include small leaves and a good reaction to pruning and root pruning, which is needed in bonsai.
You can grow these trees from methods such as taking cuttings, sowing seeds, air layering branches from an existing tree, or you can buy nursery stock or even developed bonsai trees. Some of these methods are cheaper than others, but it depends on what you want to do!
If you’ve bought nursery stock or a bonsai tree and are unsure how to plant it, then here’s how!
Repotting a Bonsai Tree
When people buy their first bonsai or receive it as a gift, they usually are pretty hasty to repot it as soon as they get it. This can be a mistake, especially if it’s not done at the right time. The optimal time for repotting a bonsai is typically in spring. However, some conifers can be repotted earlier. If you’re unsure, you should research the tree you have to ensure you can meet its specific needs.
Repotting is a crucial stage in a bonsai tree’s life cycle, and it can be pretty scary to people who have never done it before. Admittedly, it still frightens me when I work on my older trees!
The Reasons for Repotting
If you’re thinking about repotting a bonsai – you should first establish why you’re doing it. They should only be repotted for several reasons, usually because they are root bound in the pot or due to the lack of water permeability in the soil.

When a tree is left in a pot for too long, it will become ‘root bound’. This is where the roots circle themselves multiple times, unable to expand further as there is no available soil to do it. This usually occurs every two to three years, depending on the species and pot size you give it, so it’s good to check occasionally if your tree is becoming root bound.
A lack of water permeability typically happens after a few years. Water does not drain through as quickly or properly, leaving water in the pot, which can contribute to root rot. You can treat this by poking holes in the soil with a chopstick or repotting the tree in a free-draining substrate such as akadama.

Preparation
Although repotting seems like a straightforward process, it can get quite complicated, there can be lots of sources telling you different things. Here’s how I repot my trees:
- Prepare a soil mix. Before I take trees out of pots, I ensure that the soil I’m going to pot the tree in is ready. For a lot of my trees, I use akadama. However, some trees, such as azaleas, require acidic soil, such as kanuma. Some conifers will prefer pumice, which drains a lot better than akadama. This will depend on your tree, so you should research what other people have used and if it works successfully.
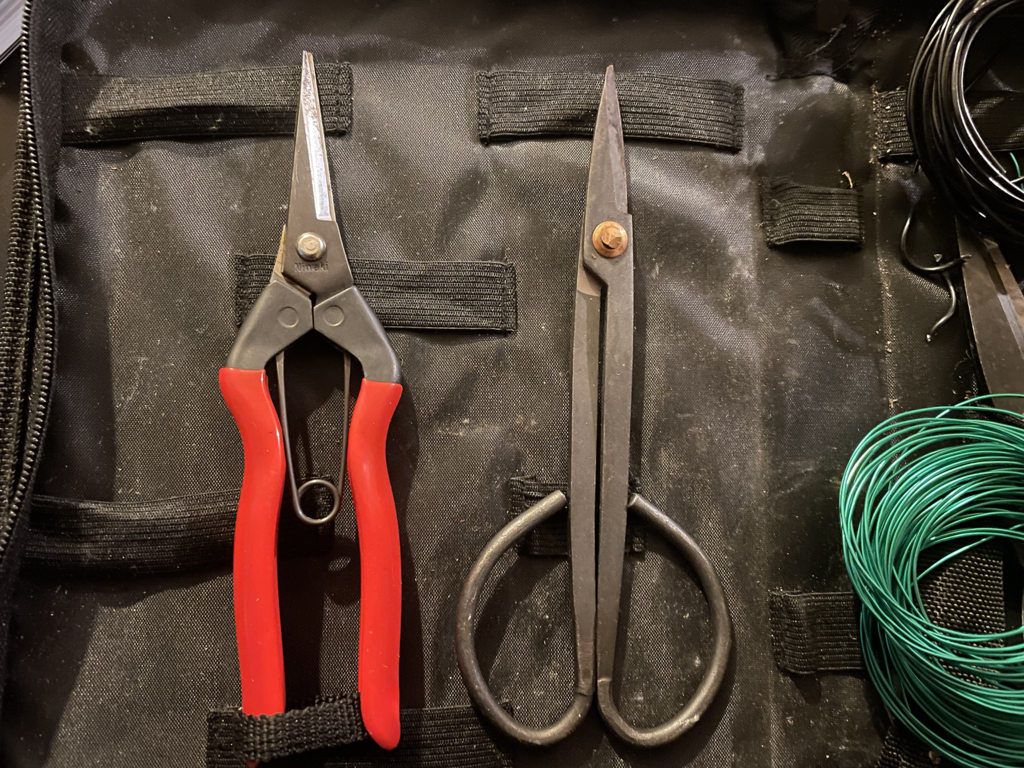
- Prepare somewhere to repot the tree. Before you start to repot the tree, I recommend you clear some space and ensure that you have all of your tools on hand and the soil mix. It would be best to have root pruners, a chopstick, pruning shears, wire cutters and pliers.
- Clean your tools! This is a significant step in preparing to repot your tree. If your tools aren’t clean, this can promote the spread of infection from tree to tree, especially when working on its roots. Make sure that you sterilize your tools with something such as rubbing alcohol.
- Put mesh in your pots. If it’s in a bonsai pot, you should put mesh over the drainage holes to prevent loose soil from falling out. You can do this by tying the mesh in with wire, ensuring it stays tight to the drainage hole.
- Add your tie-in wires. Some people don’t do this, but I always do. You should put two U-shaped wires going to each corner of the pot, which is later used to tie the bonsai tree into the pot, preventing it from falling out due to wind or other factors.

Removing the Tree From the Pot
- First, you need to loosen the tree out of the pot. If it’s something like a plastic pot, you can typically push down on the bottom of the pot or edges, which should help to loosen the soil and allow you to take it out. If it’s in a ceramic bonsai pot, you’ll have to remove any tie-in wires if it has any. You should look for them on the bottom of the pot or near the trunk, removing them with your wire cutters.
- Depending on how root-bound the tree is, you might have to try and work it out. Using something like a chopstick or a sickle, you can work your way around the edges of the pot to try and loosen it out. Once out of the pot, I recommend keeping the soil moist to ensure it doesn’t dry out before you put it into its new pot.
Working on the Tree
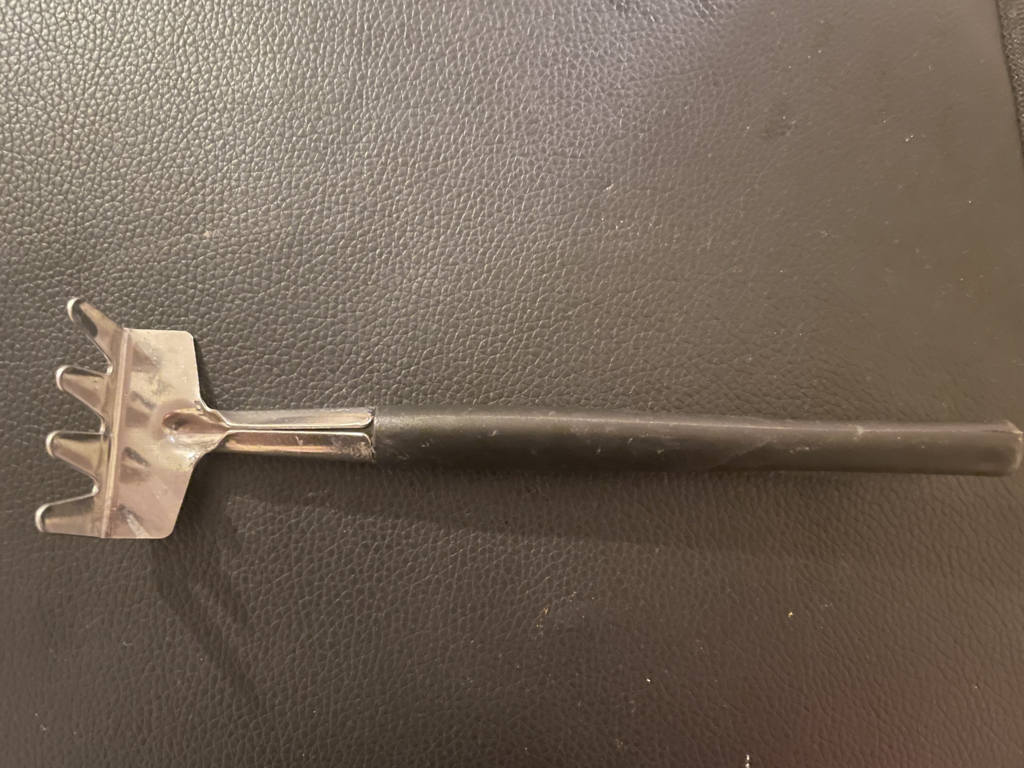
- I first take soil off the edges and bottom of the root mass. This helps to loosen the roots. I then use a small rake or chopstick to get rid of the old soil from the surface of the tree, working my way around the root mass. While doing this, I ensure that I don’t take off too much root. You don’t want to get rid of a lot of roots. This can kill the tree. I usually take around a third off.
- You can also use wedge cuts, where you cut something like a cake slice into the soil towards the center of the tree, helping to replace the old soil near the trunk with new soil. Over the years, this method will eventually get rid of all of the old soil.
- Prune any thick roots and roots which are long.

Potting On
- Once you’ve taken off all the roots you need, you can put the tree into its new pot. Add a layer of the soil mix you have chosen, piling it up in a mound in the middle of the pot. Then, place the tree into the pot, working it down onto the mound. This helps to get the soil into the bottom of the tree, ensuring there are no air pockets.
- Using your tie-in wires, tie them around the root mass near the trunk, ensuring that they are tight using your pliers.
- Fill in the rest of the empty space with soil, working it with a chopstick to fill any air pockets.
- Water the tree thoroughly after repotting.
Aftercare
It’s essential that you give a bonsai tree which has recently been repotted good aftercare. It needs to recover for a couple of weeks. To do this, I usually place it somewhere out of the full sun and wind.
Make sure you address a newly repotted bonsai’s watering needs well. You shouldn’t water it constantly to the point where the soil becomes soggy – it should just be moist. During this time, you shouldn’t add any fertilizer either. Fertilizer will burn the roots and damage them after repotting – wait around 3-4 weeks.
Now that you know how to repot a tree let’s go over how you can take a cutting from a tree to plant and grow yourself.
Taking Cuttings
By cutting a shoot off a tree or any plant, we can propagate a new one by giving it the right conditions and planting it in a soil medium. Some plants are a lot harder to strike from cuttings than others, but this may be because they need very specific conditions.

Luckily, many trees aren’t that hard to strike from cuttings, given a little experience. Trees such as junipers, azaleas, Chinese elm, and privets can all be grown from cuttings. Species such as maples can also be produced from cuttings. However, it’s a lot easier to grow a new tree from seed – though it won’t stay true to the cultivar.
To take a cutting, you should first ensure that the tree you want to take a cutting of is ready. You’ll have a better chance of striking cuttings taken at the right time, such as softwood, semi-hardwood or hardwood cuttings. Research the tree you want to take a cutting off, as chances are that many people have done it before and have specific ideas to help that species root!
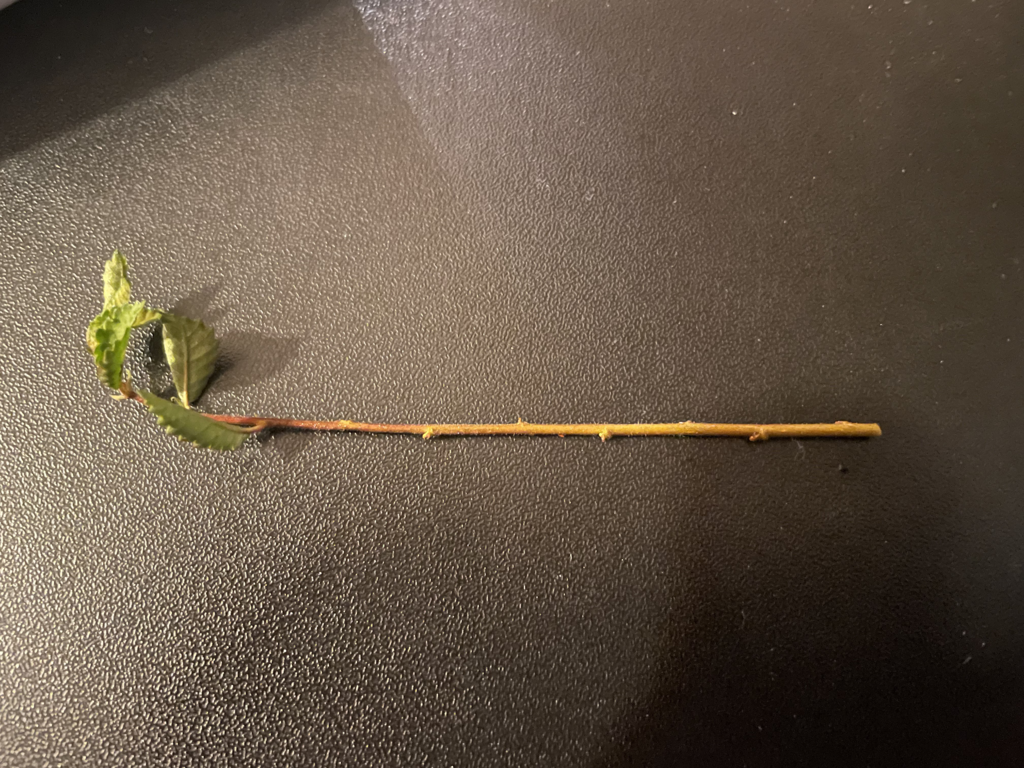
Once you’ve figured this out, you should take a cutting around 2-4 inches long at a 45-degree angle. Strip off all of the leaves on the bottom half of the cutting.
Planting Cuttings
After this, you can apply some rooting hormone which may help to encourage roots forming. Not everyone does this, but I prefer to. Rooting hormone is available online for a low price or in pretty much any garden center or bonsai nursery.

Plant the cutting about an inch deep into the soil. I usually use a mix such as akadama and sharp sand, which I’ve found works well to root cuttings. Once you have done this, water the cutting thoroughly.
I like to put a plastic bag over the container the cutting is in, which helps to keep up the humidity and the temperature, which is essential in striking cuttings. I usually keep the plastic bag on until the cutting forms roots, which can be tested by giving it a little pull. If you feel resistance, then it has most likely formed roots.
After this, I put the cutting somewhere partially shaded. It still gets a good amount of light. However, I make sure that it doesn’t get full sun. Otherwise, this puts too much stress on it.
Your cutting should have formed roots within 2-3 months. Some species may take longer to root, though. After this, I then harden off the cuttings and keep them outside.

Sowing Seeds
Seeds are very cheap and easy to obtain. You could collect them yourself from local trees or get them online.
Depending on the tree, it may be easy to grow from seed or hard. When I first started bonsai, I started with a ‘growing bonsai from seed kit’. An important thing to note is that a ‘bonsai seed’ is not real. Bonsai are simply trees which are cared for and styled in a particular way. Don’t spend extortionate amounts on these kits!
Some of the kits can be good, providing you with seeds, a pot, soil and a few tools. I would recommend buying your own individually, though, as it’s straightforward to sow seeds yourself.

Once you’ve got your seeds, you should stratify them. Some species won’t require this, but the majority do. Stratification is the process of giving the seeds a cold period before they are planted, mimicking nature. This is done by letting them soak in water and letting them sit in a refrigerator for a certain amount of months, depending on the species. You can also collect seeds and plant them at the end of winter, which follows nature’s cycle.
I usually let seeds sit in lukewarm water for 24 hours. This helps to separate viable seeds from non-viable seeds – the viable seeds should float.
Once this is done, I prepare the pot with a seed mix. This is usually composed of a mix such as compost and perlite. After this, place the seeds on top of the soil, ensuring enough space between the seeds. Then, add a thin layer of the seed mix on top of the seeds, ensuring they’re covered.
Water the seeds thoroughly, ensuring that the soil you planted them in stays moist but not soggy. Depending on the species, some seeds will need to be planted somewhere with light, while some may prefer somewhere shaded.
So, When is the Best Time to Plant a Bonsai Tree?
Overall, I would say that the best time to plant a bonsai tree is in autumn to winter from seed. From a cutting, it depends on if it’s best done from softwood, semi-hardwood or hardwood cuttings. This is normally done from spring to summer though.
Frequently Asked Questions (FAQ)
Where is the best place to put a bonsai tree?
If you have an indoor tree, I recommend putting it on a south-facing window. This helps ensure the tree gets a good amount of light, allowing it to survive and grow. Outdoor trees can be placed anywhere in the garden that gets light. However, I like to ensure that my trees get around six hours of light per day. Some species do not like being in full sun, so they are partially shaded. A quick search online will tell you what the tree prefers!
Can I leave my seedlings out in winter?
If you have germinated some seedlings and are worried about the cold killing them, you can put them in an unheated cold frame or garage. This will protect them from frost, preventing them from being killed off by harsh temperatures. I also do this with my young cuttings.
How often should I water my cuttings?
When I take cuttings, I water them quite thoroughly when planting them. After this, I typically don’t water them again for a few weeks. This is due to their relatively low water demand and lack of roots. Although, you should always check the moisture of the soil. You can give it more water if it’s starting to dry out. However, if the soil is still quite moist or soggy, you should hold off on watering until it dries out slightly. Once the cutting has formed roots, you can start watering more frequently – constantly checking the soil moisture beforehand.
How often should I water my seeds?
Watering seeds is quite similar to watering your cuttings. Water them thoroughly initially, then check the soil’s moisture every few days and give them water when needed. Seeds will usually germinate a bit faster than cuttings form roots, so expect to begin watering the soil quicker than cuttings.

