Root rot is a common issue that affects many plants, even the most experienced of green thumbs can come across this problem! Plants like the Peace lily are more susceptible to root rot. Peace lily root rot is a fungal disease followed by dark lesions that form on the roots of the plant. The leaves, crown, and stems may also be affected by this problem. This pesky disease can even kill your plant.
In this guide, we’ll show you how to deal with this disease and help you save your Peace lily. It will provide a comprehensive look at the symptoms, how to identify it and treatments! So let’s get started right away – your beloved plant needs help.
What Does Peace Lily Root Rot Look Like?

If you’re wondering what Peace lily root rot looks like, let’s just say it’s not a pretty sight. Picture a wilting, droopy, sad plant with mushy and discolored roots.
And if you thought a dying Peace lily was a bummer, wait until you see it with root rot. The leaves turn yellow and start to fall off, and the once-beautiful white flowers turn brown.
Don’t worry, there is a solution! With some tender-loving-care, fresh soil and conscientious watering practices, you can restore your drooping Peace lily root rot to full health. Just make sure to keep an eye out for that sneaky root rot, because that uninvited house guest might just come back for round two.
Signs of Root Rot in Peace Lily

As a passionate plant-lover, you understand the challenges of keeping your plants healthy and thriving. The struggle is especially real when it comes to looking after Peace lilies.
Sign#1 – The droop
Are you witnessing your Peace lily’s petals start to droop? That might be a sign of root rot – it’ll look like the plant has lost its will and vigor.
Sign#2 – The yellowing
Up next, let’s discuss yellowing. If your Peace lily leaves are gradually turning a tinge of yellow, it could be time to take action! The transformation usually starts from the bottom part of the plant before slowly making its way up; make sure you keep an eye out for any subtle symptoms that might indicate something more serious happening beneath the surface.
Sign#3 – The blackout
As things progress, you may start to notice black spots on the leaves. These spots are a sign that the root rot has taken hold. You need to find the source of the problem before the whole thing goes dark.
Sign#4 – Slower growth
Take note of the plant’s growth. If your Peace lily suddenly slows down in terms of growth, it can be because of root rot.
Sign#5 – Stinking soil
Furthermore, there’s the foul smell of decay. When a Peace lily’s soil has an unpleasant odor that is reminiscent of something rotten, then you know root rot has taken hold. This stench usually comes with opaque white substances on its roots – which serves as proof that your plant needs some assistance right away!
Sign#6 – Stems going thin
If you notice that your Peace lily’s stems are becoming thin and weakened, this could be a major sign of root rot. This is especially true for younger plants since they are more vulnerable to these types of conditions. Be sure to keep track of the state its stems are in – especially, if you see them begin to weaken or become fragile.
Sign#7 – Wilting of leaves
If it’s root rot, you’ll be seeing wilted leaves. It appears as if the plant can no longer keep itself upright and almost looks exhausted.
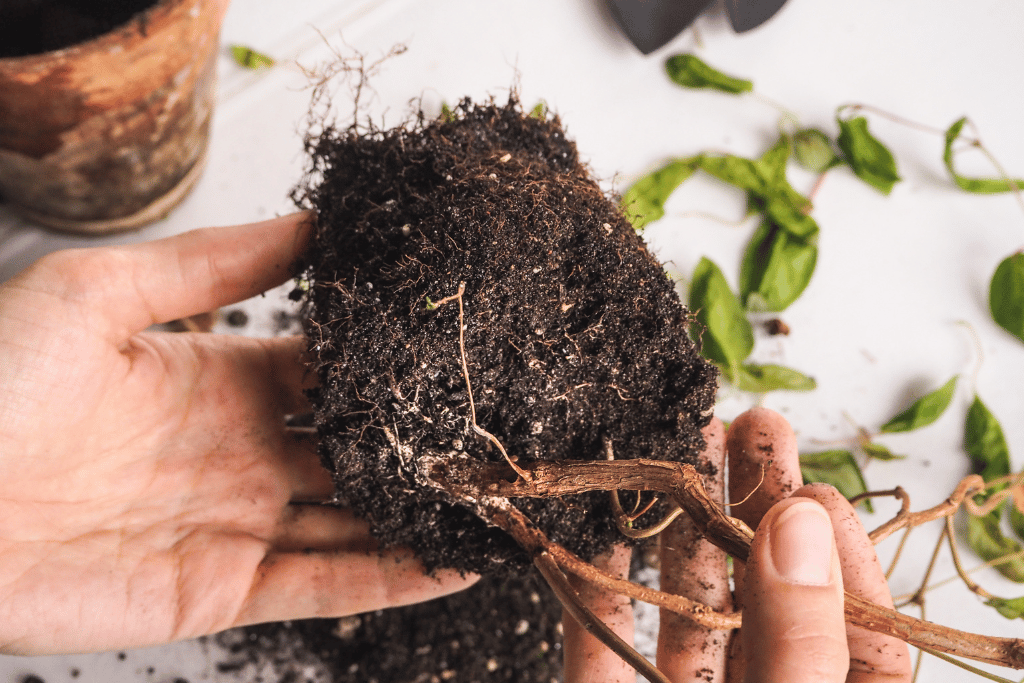
Sign#8 – Soft or browning of roots
And finally, the last sign, the roots go soft or browning. This is a sure sign that root rot has taken hold. The roots should usually feel firm and if they break easily as you pull them, it’s definitely root rot.
Now that you have a better understanding of the signs and symptoms of root rot in Peace lily, it’s time to turn to remedies. The good news is that this problem can be easily fixed with some preventive measures and proper care. Let’s look at how to treat this pesky issue!
Peace Lily Root Rot Images: A Gallery of Horrors
If you’re a visual learner, then Peace lily root rot images are the stuff of nightmares. But don’t worry, we’ve compiled a gallery of images to show you what to look out for.
Example#1: Drooping due to root rot

This is the perfect illustration of drooping. The plant’s limp posture conveys a sorrowful energy. Though its soil feels moist and its roots are soggy.
Example#2: Yellowing due to root rot

Here we see the yellowing in action. The leaves are starting to turn yellow, and the plant is looking less and less healthy. If you catch this symptom early, you may be able to save the plant before it’s too late.
Example#3: Black spots due to root rot

And finally, we have the black spots. These are a sign that the root rot has taken hold.
Root rot is a serious issue when it comes to Peace lilies, but with a little bit of knowledge and a lot of love, you can save your plant from the brink of death. So keep an eye out for the signs, and don’t be afraid to get your hands dirty.
Causes of Peace Lily Root Rot
Every plant parent knows that even the most aesthetically pleasing houseplants can be vulnerable to pesky issues like root rot. Peace lilies, one of the prettiest household plants in existence, are no exception. Let’s take a look at what causes peace lily root rot so we can act and save our beloved plants from getting sick!
Overwatering: The most common culprit
Root rot in peace lilies is typically due to overwatering, a mistake even the most seasoned gardener can make. To keep your plant healthy and vibrant, it’s best to let its soil dry out more than other plants may prefer before you water again. Unnecessarily wet soils are inviting homes for bacteria and fungi which will wreak havoc on the roots of such delicate flowers when allowed too much moisture!
Poor drainage: Don’t let your peace lily drown
While overwatering can be a major factor in peace lily root rot, lack of drainage can make this problem even worse. If the soil is unable to expel excess water, it will eventually accumulate in the pot and cause suffocation of roots, leading to decay. To test your current drainage conditions, observe if there are any pools on top of the soil after you have watered your peace lily – this could indicate that better drainage is needed!
Poor potting mix: Quality matters
When selecting a potting mix for your peace lily, ensure you choose one that offers optimal health benefits. An ideal mix should be light and airy with excellent drainage capabilities to prevent water from pooling or becoming overly saturated – this can stifle the plant’s root system and lead to dangerous rot. A good quality blend will possess these characteristics plus allow oxygen-rich breathability so the roots can do their job effectively.
Over fertilization: Too much of a good thing
Fertilizer can be a beneficial addition to your peace lily’s environment, but it is essential not to overdo it. Excess fertilizer in the soil will create a hazardous atmosphere for the plant’s roots and disrupt their ability to absorb water and nutrients. The excess of nitrogen could even damage the fine root hairs! So remember, make sure you adhere closely to what the manufacturer has suggested on how much fertilizer should be used. Don’t exceed that amount or else you might do more harm than good!
Lack of light: Your peace lily needs sunlight
While peace lilies can tolerate low light conditions, they still need some exposure to sunlight to stay healthy. Without enough light, the plant’s metabolism slows down, and it can become more susceptible to diseases like root rot. Make sure your peace lily is getting enough light by placing it near a bright window or under a grow light.
Poor airflow: A recipe for disaster
Peace lilies, like all houseplants, require good airflow to thrive. Poor ventilation can lead to an environment with stagnant moisture and increase the chances of root rot. To ensure your peace lily remains healthy and in top condition, ensure there is ample space around it for air circulation; additionally, avoid placing it somewhere humid.
Extra large pot: Size matters
While it may appear to be a great idea to provide your peace lily plenty of room for growth, utilizing an overly large pot can result in more damage than benefit. If there is too much soil present in the pot, it will keep moisture for far too long and consequently cause root rot. Decide on a holder that is slightly larger than the plant’s existing container, and only repot when absolutely needed.
Fungal or bacterial attack:
Peace lily root rot is caused by a variety of fungal and bacterial organisms. The most common culprits are Phytophthora parasitica, Pythium spp., and Fusarium oxysporum. These organisms can enter the root system through wounds, and if the soil is constantly wet (contributing to an overwatered peace lily root rot) or lacks proper drainage, the fungi can begin to take hold and spread.
How to Treat Root Rot in Peace Lily

Wondering how to save a peace lily from root rot? Well, there are two popular treatments: repotting and treating with hydrogen peroxide.
Wondering how to save a peace lily from root rot? Well, there are two popular treatments: repotting and treating with hydrogen peroxide.
Treatment#1 – How to repot a peace lily with root rot?
Repotting a peace lily with root rot is essential to save the plant from dying. This process can be intimidating, but it is a straightforward task that requires some basic tools and steps to follow. In this guide, we will walk you through how to repot a peace lily with root rot.
Supplies needed
To repot a peace lily with root rot, you will need the following supplies:
- Garden shears or pruners
- Disinfectant
- New pot with drainage holes
- Fresh potting mix
- Fungicide
- Bleach
- Watering can or spray bottle
Step 1. Take the plant out of the pot:
The first step is to take the Peace lily out of its pot. To do this, gently hold the main stem of the plant and tilt the pot to the side. The plant should slide out of the pot easily. If it doesn’t, tap the sides of the pot to loosen the soil.
Step 2. Examine the roots and wash away the soil:
After you have removed the plant from its pot, assess the roots delicately. Use a gentle stream of water to carefully expose the surrounding soil and uncover those hidden roots.
Step 3. Prune damaged roots:
With garden shears or pruners in hand, snip away any decayed and damaged roots. Keep only the strong and healthy ones intact, while erring on the side of caution by not exceeding a third of all root systems.
Step 4. Spray fungicide and soak in a bleach solution:
After pruning, spray the remaining roots with fungicide. You can also soak the roots in a solution of one-part bleach to ten parts water for an hour to eliminate any remaining bacteria or fungi.
Step 5. Choose a new pot with drainage holes:
Choose a new pot with drainage holes. Make sure it is slightly larger than the previous one to allow for growth.
Step 6. Add fresh potting mix:
Fill the new pot with fresh, well-draining potting mix. Add enough potting mix to fill one-third of the pot.
Step 7. Put the plant back in the pot:
Place the Peace lily back in the pot, making sure the roots are spread out. Add soil from all sides and ensure there are no air pockets left. Gently press the soil down with your hands.
Step 8. Water the plant:
When you have finished repotting the plant, make sure to give it a thorough dousing. You can use either a watering can or spray bottle for this purpose; however, do not overdo it! Be mindful to check the soil consistently and only water when necessary— specifically when its dryness has become apparent.
Treatment#2 – How to treat peace lily root rot using hydrogen peroxide
Another way to treat Peace lily root rot is by using hydrogen peroxide. Here’s what you’ll need:
- Hydrogen peroxide (3%)
- Water
- A spray bottle
- A container
Step 1: Remove your peace lily from its pot
Take your Peace lily out of its pot, being careful not to damage the remaining healthy roots.
Step 2: Rinse the roots
Rinse the roots with water, getting rid of any excess soil. If the roots are too dirty, gently massage them with your fingers to get rid of any debris.
Step 3: Prepare your hydrogen peroxide solution
In your container, mix equal parts water and hydrogen peroxide.
Step 4: Soak the roots
Soak your peace lily’s roots in the hydrogen peroxide solution for about 30 minutes. This solution will kill any fungal growth on the roots, which can cause the root rot.
Step 5: Rinse the roots
Rinse the roots with water again to get rid of the hydrogen peroxide solution.
Step 6: Repot the Peace lily
Once you have removed all the fungus and debris from the roots, repot your peace lily in fresh potting soil. Make sure to water the plant lightly to prevent further root rot.
Step 7: Prevent future root rot
To prevent future root rot, make sure to water your peace lily properly. Only water when the soil is dry, and never overwater.
Conclusion
Peace lily root rot is an unfortunate condition that may affect any peace lily, especially if it is not well-taken care of. In order to repair the damage from root rot, it is important to identify the signs of root rot and take the necessary steps to treat it.
We hope this guide has helped you learn how to identify and treat root rot in peace lilies. With proper care, your plant should return to its healthy state in a jiffy.

