
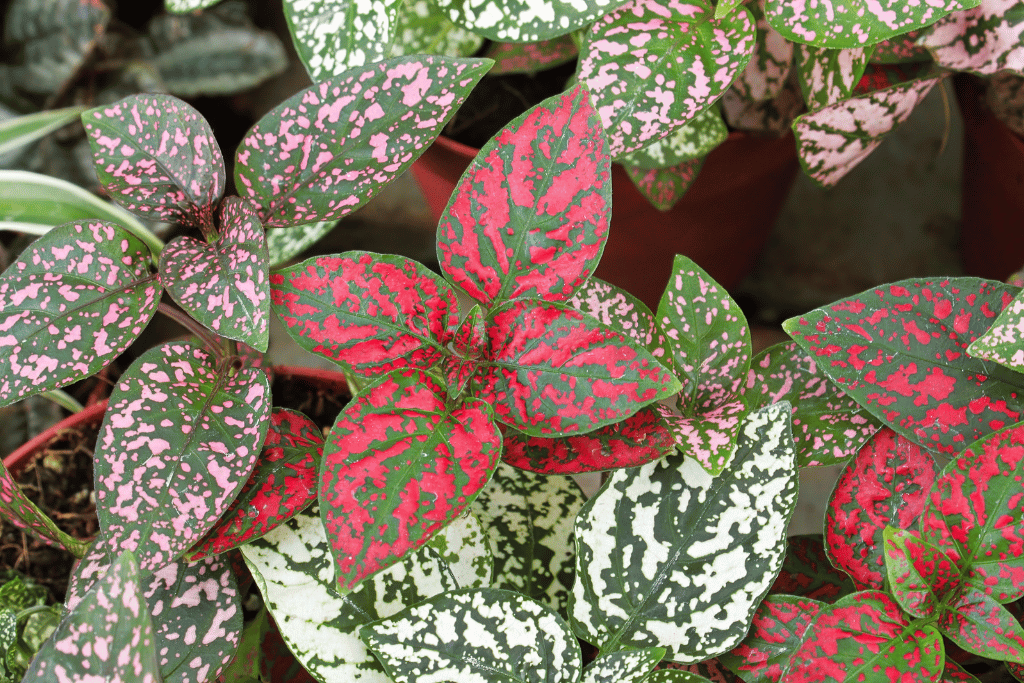
Polka dot plants, known also as Hypoestes phyllostachya, are popular indoor plants which are native to Madagascar. Most commonly, they’re known for their beautiful, striking and spotted foliage which comes in a wide variety of colors, such as green, red, white and pink. Luckily, polka dot plants are easy to grow and care for, which makes them an excellent choice for new and novice gardeners. Caring for a fully grown plant is fun, but one of the best things about these plants is that they are relatively easy to propagate, meaning you can get an entirely new one for free from an existing one.
Propagation is one of the things I enjoy most with plants. There are many advantages to propagation, such as being able to shape plants in the way you want them from young, which is particularly advantageous if you enjoy working with bonsai trees. Another advantage is that it’s essentially completely new plants for free! All you need is a growing medium, a container to grow the plants in and perhaps something such as a propagation dome (though you don’t need to go that fancy, a simple drinks bottle will do).
Stem Cutting Propagation

One of the most widely known, popular and straightforward methods to propagate polka dot plants are through the propagation of stem cuttings. This method involves taking a cutting from the parent plant and encouraging it to grow roots by subjecting it to specific conditions. Let’s go over the steps for stem-cutting propagation.
- First, you’ll need to select a parent plant that is healthy and in good condition. It may not be a good idea to take cuttings from a plant that is struggling, as you are removing a food source from them which may lead to them dying. It’s best not to take cuttings from plants that have a disease or pest infestation as well, as this will manifest in the cutting and will likely completely stop root growth in the cutting (causing it to fail) or will lead it to an early death when the roots strike.
- Using clean and sharp scissors or pruners, you should then take a cutting from one of the stems that are around three to four inches. Try to take the cutting just below a leaf node, which is the point where the leaf attaches to the stem. This will hopefully increase the chance of your cutting striking.
- Once you’ve got your cutting, you now need to remove the leaves from the lower half of the cutting. This will help to reduce the stress on any newly formed roots, focus the plant’s energy on root development, and prevent the leaves from rotting from coming into contact with the soil.
- With polka dot plants, you can root them in water. Fill a glass or jar with water, ensuring that you submerge the bottom of the stem. If you don’t like to use water to root cuttings, you can also place the cutting directly into a moist potting medium, making a small hole for the cuttings to go in with your finger or pencil. Gently insert the cutting – you can dip it in some rooting hormone too if you’d like. This may increase the chances of the cutting rooting.
- Now that you’ve got your cutting planted in the soil, you should position it somewhere bright that receives indirect sunlight. Direct sunlight could burn the leaves of the cutting, harming them and preventing them from developing roots. I would recommend using something to keep the humidity of the cutting up as well, by placing a propagating dome over it or by using something like a plastic, transparent food bag over the top.
- If you’ve opted to use water propagation, you should change the water every few days to make sure that you prevent the growth of any harmful bacteria that could damage the plant. If you’re using soil, make sure that the soil doesn’t completely dry out and that it remains moist, not waterlogged. Waterlogged soil can promote the development of bacteria too, and may rot your cutting if left for too long.
- Hopefully, over the course of a few weeks, your cutting should begin to develop roots and produce new leaves. You should note that in general, some species of plants will like to throw out leaves before putting on any actual root growth. To test if your cutting has roots, you can gently pull it – if there’s resistance, there are likely roots.
- When your cutting has a good, established root system with new growth, you can then transplant it carefully into a suitable pot with well-draining soil. The new pot shouldn’t be too massive as this can harm the cutting, but it should be slightly bigger than the pot you rooted it in to make sure the roots can grow well.
Propagation by Division

Stem cuttings aren’t the only effective way for propagating polka dot plants – division is another effective method. This is particularly useful if the parent plant has many stems and a good, well-established root system. To propagate your polka dot plant through division, follow these steps:
- Gently remove the parent plant from its pot, making sure that you don’t damage the roots.
- Now, carefully separate the root ball into smaller sections, making sure that each division of the root system has its own set of roots and stems.
- After this, you can prepare pots with fresh potting soil to plant your divisions in.
- Plant each of the divided sections into their own pot, making sure the roots are adequately covered with soil and are firmly in place.
- Water the divisions you have just potted up thoroughly, making sure that the excess water is draining from the pot. We don’t want the soil to be waterlogged, so the pot should have good drainage holes.
- Place the divisions in a bright location with indirect sunlight, like the stem-cutting method.
- The soil should be kept consistently moist to make sure the division has good access to water for roots, but you should prevent having the soil waterlogged to prevent root rot from occurring.
- Within a few weeks, you will hopefully have new growth emerging, which will show that your division has successfully been propagated!
- Divisions are simply new plants, so you should care for them as you would mature polka-dot plants. Though I would recommend diluting any fertilizer you give them a bit to make sure that the new roots can get established and you don’t burn them.
Seed Propagation

If you’re really dedicated to getting new polka plants, you should consider propagating them through seed. It’s a great way of getting new plants and supervising them from scratch, witnessing their journey to being a fully mature polka dot plant. Note that propagating by seed will mean that they don’t stay true to the cultivar, and likely different traits could appear.
- Collect seeds when they are ripe, these are typically small, black and can be found inside the pods that form after a plant has flowered and been pollinated. Once you have noticed your polka dot plant producing the pods, allow them to dry on the plant before harvesting them.
- Now, fill a seed tray or small pots with a good, well-draining potting mix. I like to use a mix of potting soil and perlite. Perlite will help to improve drainage, making sure that the soil doesn’t stay too wet. Moisten the potting medium before sowing the seeds.
- Sprinkle the seeds you have collected from the polka dot plant on the surface of the soil – burying them deep will prevent germination as they require adequate levels of light to ensure germination occurs. You can press them gently into the soil to make sure they make good contact.
- Mist the surface of the soil with water, helping the seeds to settle in place. I like to frequently mist the surface of the seed tray. You’ll notice that the potting medium will likely not dry out for a few days or weeks, so misting is a good alternative to watering small amounts frequently.
- To keep humidity in, you should cover the tray or pots with a clear plastic lid or wrap to simulate a greenhouse-like environment, helping to retain moisture. If you’re a bit more of an advanced grower, you may consider using a seedling heat mat to provide bottom heat for the seed trays, helping to get better/faster germination rates.
- Once this is done, you should place the tray or pots in a warm location (around 70-75F or 21-24C) for good germination rates. Make sure not to place them in direct sunlight, opt for indirect sunlight instead.
- Check the moisture of the soil medium regularly, misting it if it gets dry. You shouldn’t water the soil constantly, as this could rot the seeds and prevent germination from happening.
- Some seeds may take around one to two weeks to germinate, but some may take even longer. When the seedlings do emerge, you should remove the plastic cover and put them somewhere bright with indirect sunlight to make sure the leaves don’t get burnt and reduce stress on the newly formed roots.
- When the seedlings start to grow, you can thin them out if they are densely planted, giving them sufficient space to develop. This helps to prevent overcrowding and competition for resources such as water, light and nutrients. Any seedlings that seem very weak can be removed completely.
- Once they have started to develop their sets of true leaves, you can then transplant them into their own pots in good, well-draining soil. Continue to provide them with adequate light, water and suitable growing environments. Over time, the seedling will mature and develop its signature, spotted foliage!
How To Make Yourself A Better Propagator
Propagating plants is one of the most rewarding and fun things to do in horticulture – in my opinion. Not everyone enjoys it. It can take quite a while, and some species will simply refuse to develop their roots and live. It can be frustrating at times, but seeing that new growth and transplanting cuttings with lovely root systems is an amazing feeling. So, I’ll provide you with some tips on how you can propagate polka dot plants better.
- Bright, indirect light is a must. Polka dot plants typically thrive in bright light conditions, but they should ideally be protected from long exposure to direct sunlight, which can burn their delicate leaves. Ideally, a location in a north or east-facing window is typically best for them. I like to keep a lot of my houseplants in a north window, where they do perfectly fine.
- Humidity essential for propagation. Maybe it’s not such an important factor for every species, but I always try and make sure my cuttings and seeds have high levels of humidity. You can do this by placing a tray of water near the plants or by using a humidifier, but I simply place a clear, plastic bag over the cuttings or seeds to keep the moisture in. I also have a cold frame, which provides a greenhouse-like effect for seeds and cuttings alike. Misting the leaves regularly will work too, helping to create a humid microclimate.
- Getting the watering aspect of propagation correct is essential. You should be keeping the soil moist, but not waterlogged. I like to check the soil regularly by poking my finger about an inch deep into the soil. Adjust the frequency of watering based on how it feels, environmental conditions, and the specific needs of the plant you are propagating.
- Frtilizing. I’m not one for fertilizing cuttings or seeds for their first year, but I do know that some people absolutely insist on this. I would recommend doing your own research into the species you are propagating, as they all have different tolerances. What I have experienced is fertilizer burning sensitive roots and preventing water uptake for young plants, but this becomes less of a problem as they get older. You should feed your polka dot plants with a balanced and water-soluble fertilizer, around every two weeks during the growing season.
- Temperature. In average room temperatures such as 65-75F (18-24C), polka dot plants will do amazingly. You should avoid exposing them to extreme temperatures or temperature fluctuations caused by factors such as air conditioning, as this can have an effect on polka dot plants and many other houseplants, such as orchids too.
- Pruning and regular maintenance. Many people think that pruning their plants is a bad thing as it stunts growth, but it can actually promote new healthy growth. You should regularly pinch back the growing tips of polka dot plants, which will encourage bushy growth. This results in a fuller, more compact plant. Any yellow or damaged leaves can be removed to maintain the overall health of the plant.
- Look out regularly for pests and diseases. While polka dot plants are typically resistant to many pests and diseases, it’s always a good idea to check them regularly for any signs of troublemakers. Common pests will include spider mites, whiteflies and aphids. Any infestations should be treated as soon as possible using an organic insecticide, or by manually removing the pests. Diseases such as leaf spots (a fungal disease) can be prevented by ensuring the plant has good circulation and preventing overwatering.
- Good space. When your polka dot plants start to grow and mature, they will eventually outgrow their current pots. Transplanting them into slightly larger pots with fresh potting soil with provide them with plenty of space to grow, making sure they aren’t cramped and don’t become root-bound. Be gentle when transplanting, trying not to damage the roots. Don’t worry if you accidentally snap a root or two off, it should be perfectly fine as long as it’s in good condition.
Patience is key when propagating plants. Some species may take a few days to strike roots, while some can take weeks or months. Not every cutting or seed you sow will successfully develop and mature into a new plant, but with experience, research and perseverance, you’ll become very good at propagation in no time. Observe what your plants are doing, what they’re suffering from and how you can improve their conditions and soon you’ll have too many plants in your home.
Propagating by stem, division or seed all have their own different challenges. My most common method of propagation is cuttings, but I have started to sow seeds recently to improve my skills. I find seeds a lot more challenging than cuttings, but some people may have contrasting opinions. Find out what works best for you and your polka-dot plants!
By following the steps outlined in the article above, you’ll be able to successfully propagate new polka dot plants and other species, helping to expand your collection greatly. Have fun propagating.
Frequently Asked Questions (FAQ)
Can polka dot plants be propagated from leaf cuttings?
Unfortunately, polka dot plants cannot be propagated from leaf cuttings. Unlike some species that are able to be propagated from leaf cuttings such as a Jade plant, these cannot. Polka dot plants are propagated through stem cuttings, division or by seed. Likely, using a leaf cutting will not root or develop into a new plant.
How long will it take for my polka dot plant cutting to root?
Depending on the conditions you are keeping the polka dot cutting in, the rooting time can vary. Typically, you can expect to see roots within around two to four weeks. Factors such as humidity, the health of the parent plant and temperature will influence the rooting speed. It’s important to be patient and make sure you’re giving it proper care during this period, ensuring that the rooting is successful
Can you propagate variegated polka dot plants?
Variegated polka dot plants are able to be propagated using exactly the same methods as non-variegated ones, such as division or stem cuttings. Though, you should note that variegation is a result of a genetic mutation, meaning that any cuttings you take or divisions may not keep the same variegation pattern as the parent plant. To preserve the variegation, it’s best to propagate it from the healthy sections of the plant which have the variegated traits you want.
What’s the best time to propagate polka dot plants?
I would recommend propagating polka dot plants during the active growing season, which is typically in spring through to early summer. During this time, the plants are actively putting out new growth, which makes them a lot more likely to have a better chance of being propagated. Though, if you are able to give it the proper care and suitable conditions, you can have a try at propagating them throughout the year – though rooting and growth will likely be slower during the dormancy period in winter.

