Ready to bring some gorgeous lavender to your garden? Lucky for you, propagating this fragrant herb in water is a walk in the park!
If you’re not familiar with plant propagation, don’t worry; it’s just a fancy way of saying making new plants from existing ones. And when it comes to lavender, the benefits are as sweet as honey- its soothing scent to its medicinal properties; lavender has been a staple in gardens for centuries.
While it is possible to grow lavender from seeds, propagating lavender in water from cuttings is a much faster and more reliable method. It can be done with very little materials, and you can create a whole new garden of these purple beauties. And if you’re feeling generous, you can even give them away as gifts.
About Lavender

Lavender is a beautiful and fragrant plant that has been grown for centuries for medicinal, culinary, and decorative purposes.
The famous herb is native to the Mediterranean region, particularly in countries such as Spain, France, and Italy. It has been cultivated and used by ancient civilizations for thousands of years for its healing properties. It is commonly used in aromatherapy for its calming and relaxing effects, is also used in perfumes, soaps, and candles, and is known for treating anxiety, insomnia, and stress.
In the kitchen, lavender is often used in baked goods and desserts for its unique flavor. In the garden, lavender is a popular ornamental plant that adds color and fragrance to any landscape.
The perennial herb grows up to 3 feet tall and 3 feet wide. It has narrow gray-green leaves and produces clusters of small purple-blue, pink, or white flowers. Avenger is drought tolerant and prefers full sun and well-draining soil.
As a member of the Lamiaceae family, it makes lavender a relative of other herbs such as mint, thyme, and rosemary. It is also closely related to other ornamental plants such as salvia and nepeta. There are over 450 different species of lavender, each with its own distinctive features. In the garden, lavender is used to attract beneficial insects such as bees and butterflies.
What You’ll need to Propagate Lavender in Water

If you are interested in propagating lavender in water, you’ll need a few main key materials to get started. Here’s a breakdown of what you’ll need:
- A healthy Lavender plant- It’s important to choose a healthy plant to propagate from, as this will increase your chances of success. Look for a plant with strong, sturdy stems and healthy foliage.
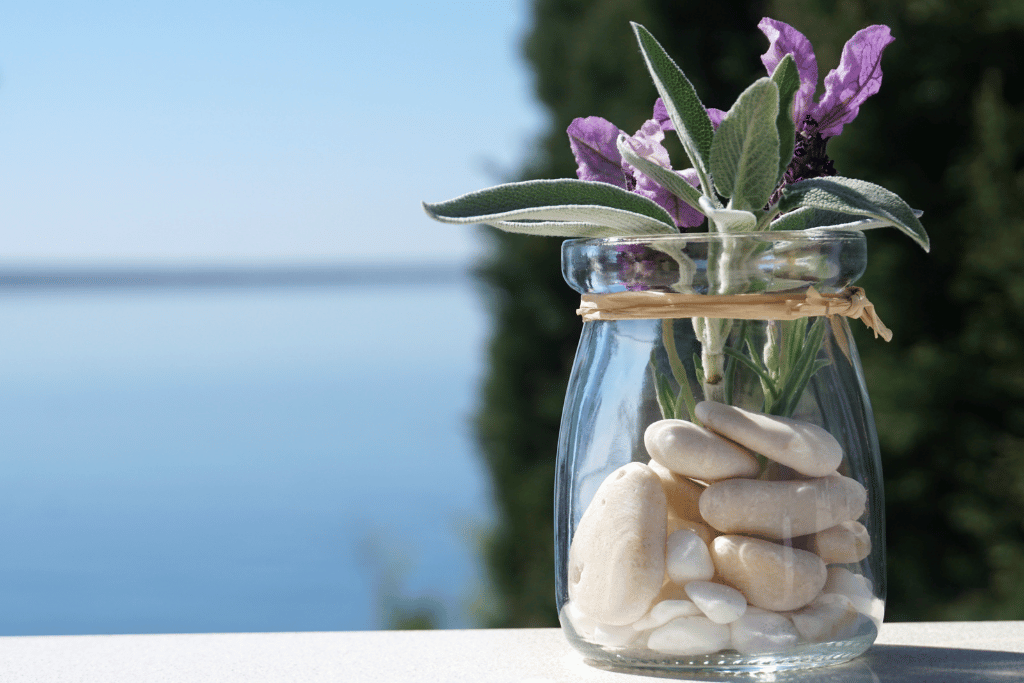
- A jar or vase- You’ll need a container to hold the water and the lavender cutting. A clear glass jar or vase works well, as it allows you to see the roots as they grow.
- Clean water- Use fresh, clean water to fill your container. Avoid using chlorinated water, as this can damage delicate roots.
- Scissors- You’ll need a clean, sharp pair of scissors to take your lavender cutting. Make sure to disinfect your scissors before using them to avoid introducing any bacteria or fungi to the cutting.
- Rooting hormone (optional)- If you have rooting hormone, you can dip the end of your cutting in it before placing it in the water. This can help stimulate root growth and increase your chances of success.
With these materials in hand, you’ll be ready to start propagating your lavender in water.
How to Propagate Lavender in Water

Now that we have our materials ready, let’s dive into the step-by-step process of propagating lavender in water.
To start, you need to prepare your lavender cutting. Choose a healthy stem that’s not too woody or too young. Make sure it has a few leaves on it and is at least 4-6 inches long.
Next, use a clean, sharp pair of scissors to cut the stem at a 45-degree angle, just like a hairstylist giving you a fresh new look.
After that, prepare your jar or vase. Give it a good scrub with soap and water to make sure it’s squeaky clean. Then, fill it up with clean water, making sure to leave some space at the top for air.
Now, if you want to give your lavender a little extra help, you can dip the stem into rooting hormone before placing it in the water. Think of it as giving your plant a power-up before it starts its journey!
After adding rooting hormone (if desired), place the stem in the water-filled container, making sure that the bottom of the stem is fully submerged in the water. Then, place the container in a sunny location, preferably near a window where it can soak up some rays.
Now it’s time to sit back, relax, and let your lavender do its thing! In a few weeks, you’ll start to see some little roots sprouting from the stem. It’s important to monitor the roots and change the water regularly (about once a week) to keep them fresh and clean.
And that’s it! Before you know it, you’ll have a fully rooted lavender plant that you can grow into a fully established plant.
Transplanting the Lavender into Soil

Once your lavender cutting has grown some roots and is ready to be transplanted, you have two options- you can either keep it in water as a decorative statement or transfer it to the soil to continue its growth.
To transfer your lavender to the soil, you’ll need a pot with well-draining soil, such as a mix of potting soil, sand, and perlite. Choose a pot that’s slightly larger than the root system of your cutting, and make sure it has drainage holes to prevent waterlogging.
Gently remove the lavender cutting from the water, being careful not to damage the delicate roots. Then dig a hole in the soil and place the cutting in the hole, making sure the soil is firm around the stem.
Water the soil thoroughly, making sure that the excess water drains out of the pot. Place the pot in a sunny location and water the plant regularly, making sure not to overwater it (lavender doesn’t like soggy soil!)
As your lavender plant grows, you can prune it to maintain its shape and promote bushiness. Don’t be afraid to use the trimmings for cooking, crafts, or to propagate more lavender!
Tips for Success

Congratulations on taking the first step toward propagating your own lavender! To ensure your success, here are some tips to keep in mind:
- Choosşng the right stem to propagate: It’s important to choose a healthy stem with at least a few leaves on it. Avoid stems that are too woody or too young, as they may not have enough energy to grow rots. Remember, the quality of your cutting will determine the success of your propagation!
- Using clean tools: Always use clean and sharp scissors when cutting your lavender stem. This will help prevent infection and ensure a clean cut that will promote healthy root growth.
- Maintain the right amount of sunlight and water: Lavender likes lots of sunlight, so make sure to place your container in a sunny location. However, be careful not to place it in direct sunlight as this can cause the water to heat up and damage the roots. As for water, make sure to change it regularly and avoid overwatering your plant. Lavender likes well-draining soil, so don’t let it sit in water for too long!
- Transplanting at the right time: Once your lavender has grown some roots and is ready to be transplanted, make sure to do it at the right time. Don’t wait too long, as the roots may become too entangled in the water and make it difficult to transfer to soil. On the other hand, don’t transplant too early, as the roots may not be strong enough to support the plant in the soil.
By following these tips, you’ll be well on your way to successfully propagating your own lavender! Remember to be patient and give your plant the care it needs to thrive.
Growing Lavender in Water: A Simple and Effective Propagation Method
Propagating lavender in water is an easy and rewarding way to grow this beautiful, fragrant plant at home. With just a few simple materials and some care, you can create a new plant from an existing one and enjoy the benefits of lavender in your home or garden.
Remember to choose a healthy stem, use clean tools, maintain the right amount of sunlight and water, and transplant at the right time to ensure success.
Whether you are a seasoned gardener or a beginner, propagating lavender in water is a fun and satisfying way to learn more about this amazing plant. So why not give it a try and see where it takes you? Who knows, you might even discover a new passion for gardening and a newfound appreciation for the wonders of nature!
Ready to Start Your Gardening Journey?
Explore our website and discover expert tips and useful resources to help create the garden you deserve.
We’ve got a whole heap of in-depth plant care guides and info on all the necessary tools you need to start your journey to becoming a successful plant parent
Frequently Asked Questions (FAQ)
Can all types of lavender be propagated in water?
Most types of lavender can be propagated in water, but some may be more difficult than others. It’s best to choose a healthy stem from a mature lavender plant that is actively growing.
Do I need rooting hormone?
Using the rooting hormone is optional, but it can increase the chances of success. Rooting hormones can be found at most garden centers and nurseries. Some believe that cinnamon or honey work in a similar way, so you could always give them a try.
How long does it take for lavender to root?
Lavender typically takes around 2-3 weeks to root in water. However, it can take a long time, depending on the conditions and the quality of the cutting.
How often should I change the water?
It’s recommended to change the water every 2-3 days to keep it fresh and oxygenated. This will prevent the growth of harmful bacteria and ensure healthy root growth.
Can I transplant the lavender directly into soil from water?
Yes, once the lavender has grown some roots, it can be transplanted directly into the soil. However, make sure to wait until the roots are at least 2-3 inches long and to use well-draining soil to prevent root rot.
Can I propagate lavender in the winter?
While it’s possible to propagate lavender in the winter, it may be more difficult due to the lack of sunlight and cooler temperatures. It’s best to wait until the spring or summer when conditions are more favorable.