I don’t need to introduce what makes a bird of paradise plant beautiful. If you’re here, I’m sure you’re already aware of the striking resemblance its flowers have to a bird. Its vibrant flowers and dense foliage make it an attractive addition to many household settings.
So let’s get down to the business: How to propagate a bird of paradise plant?
In my experience, rhizome division is the simplest method to propagate a bird of paradise plant. It involves taking the plant out of its pot, dividing the rhizome, and planting it in a new pot. There is another method called seed propagation. It takes longer to show results, is more complicated, but also promises a better learning experience.
To deeply understand how each approach works, follow this step-by-step guide as I discuss these methods with my experience in gardening sprinkled over the mix. But first, a word about the bird of paradise plant itself.
Overview of Bird of Paradise
Bird of paradise is a stunning plant that grabs attention due to its iridescent blue and orange flowers that look like a bird of the same name. Botanically known as Strelitzia reginae, this plant is native to South Africa. The plant naturally grows among coastal bush and riverbanks. However, in the US and other regions, this plant is used as an ornamental houseplant for its tropical vibe and colorful flowers.

The plant usually blooms during autumn, winter, and spring; however, it needs to reach maturity before that. It can grow up to a height of 30 feet (outdoors) and has large leaves, much like the leaves on a banana tree. The leaves can be 3-4 feet long and 18-24 inches wide. For this reason, the plant is excellent at adding foliage and color to indoor settings.
The leaves are upright and emerge from the soil; the plant has no trunk. This plant can also be toxic to cats and dogs. There are two ways when it comes to propagating bird of paradise plants:
- Propagation through division.
- Propagation through seeds.
Let us discuss these two methods and a step-by-step process of how to do it.
How to Propagate Bird of Paradise Plant
Propagating Bird of Paradise by Division
Rhizome division is one of the simplest and easiest ways to propagate the bird of paradise, especially if you’re doing it for the first time. You see, a bird of paradise can not be propagated using the stem or leaf-cutting method. You need to take the plant out of its pot, divide it, and plant it in a new potter to propagate.
But let’s understand what a rhizome is first.
Rhizome is a type of underground stem that can produce roots as well as aboveground growth like leaves and flowers. One of the most common examples of a rhizome in our kitchen is ginger. Instead of consuming the leaves or fruit of a ginger plant, we use its rhizome. Turmeric is also a rhizome that we commonly use. The rhizome of a Strelitzia looks much like ginger or turmeric.

In a bird of paradise plant, these rhizomes are found under the soil, which you must take out to propagate your plant. For propagation to be successful, you need to follow certain steps for dividing and repotting the rhizomes the right way. Here’s what they are:
Step 1: Unpotting the Plant
The first step is to remove the plant from its pot and remove the soil so you can clearly see which rhizomes to separate. Start by holding the base of the plant closest to the soil. Tap around the pot to loosen the soil and gently pull the plant out.
One thing that I like to do is to water the soil lightly a few hours before removing the plant. This unsticks the soil and the roots clinging to the pot, making it much easier to pull the plant out. If you have a plastic pot, you can press its edges to pull out the plant more easily.
Once you have unpotted the plant, gently clear the soil away from the rhizome and roots. This will give you a clear view of the rhizomes, which brings us to our next step.
Step 2: Observing the Roots
Once you can see the rhizomes and roots after clearing the soil, it is time to observe the root health. Look for any signs of problems like fungal infections or root rot. Healthy roots should be white or cream-colored and firm to the touch. On the other hand, sick roots will be brown/black and mushy. Before moving to the next step, cut away all the diseased roots with a sharp knife, sterilizing it before each cutting.

Step 3: Observing the Rhizomes
How many stems you have above the soil usually correlates with the number of rhizomes you will have. However, it is not uncommon for two stems to emerge from a single rhizome. A rhizome with two stems will result in a fuller division with more foliage. It doesn’t have any other advantage over a rhizome with a single stem. Your goal should be to separate each rhizome carefully while keeping the stem(s) and roots intact.
Step 4: Dividing the Rhizomes
If you have a large plant, you might come across clumped rhizomes. This structure can make it harder for you to separate rhizomes as the roots are intertwined. For this reason, propagating a smaller plant by division is relatively easier.

If you experience clumped rhizomes, you’ll have to use a sterilized and sharp knife to cut through the tangled roots and separate the rhizome. Once you have cut the roots, separate the rhizomes so that each division has healthy stem(s) and roots growing from it.
Some people recommend applying rooting hormone to the cut roots; however, in my experience, I haven’t found it to be absolutely essential.
Step 5: Potting the Divisions
Potting the divisions is a simple step that brings propagation to completion. You can immediately transfer the division to a new container, but there are a few best practices to follow.
Firstly, ensure that the new pot is at least 4-6 inches wider and deeper than the pot of the parent plant. The pot may look too big for a division, but the bird of paradise is a fast grower if provided with a healthy environment. Smaller pots can make your plant root bound in a few years, leading to root death. It is also important to repot your Strelitzia every couple of years.
You can trim the roots by up to 20% if the pot can’t accommodate their haphazard growth. However, you should always resanitize your cutting tools after each cut with rubbing alcohol. This will reduce the chances of an infection, ultimately resulting in successful propagation.
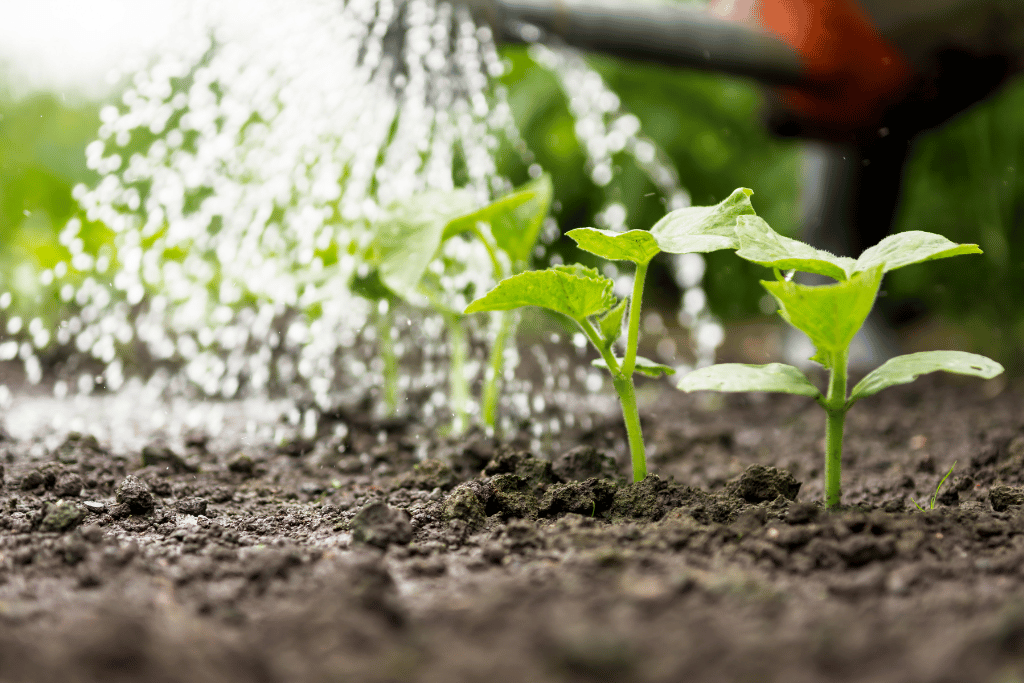
Prepare your pot for the new division by sprinkling a layer of grit at its base. Place the division in the center at the top of the grit and fill the container with fresh potting soil. Use well-draining soil that is ideally the same as the soil you used for the parent plant. Place the pot in bright and indirect sunlight for the first few months.
Based on my firsthand experience, I’d also advise you against watering and fertilizing at this point. Misting once or twice daily is fine, but don’t go overboard. Since the rhizomes are a little shocked after propagation, it takes them some time to adjust to a new environment. You can put the plant back on the regular watering schedule after a few days of division.
It is common for the leaves to droop or turn yellow for a few days. However, if you take good care of the plant, the leaves will gradually restore to their usually vibrant selves. Your plant doesn’t need fertilizer until the next growing season.
Propagating Bird of Paradise from Seeds
Another method of propagating a bird of paradise is by using seeds. Even though the division method is the simplest and most prevalent, some people choose the seed method. The plant also propagates in its natural habitat through seeds.

Propagating with seeds can be a learning experience but is also more complicated. Growing a new plant from seeds requires special attention, knowledge, and lots of patience. It can take years for a bird of paradise plant to mature and bloom when growing from seeds. Besides its simplicity, many people prefer the division method because it produces results quickly. Let us discuss a step-by-step process of propagating a bird of paradise from seeds.
Step 1: Acquiring Viable Seeds
For a Strelitzia plant to produce viable seeds, its flowers must be fertilized. However, if you’re growing a bird of paradise plant indoors, its flowers might not be able to produce seeds. Indoor plants are not exposed to birds, which are natural pollinators of bird of paradise plants.

If that’s the case, you’ll have to purchase seeds from a greenhouse supplier or a garden supply store. However, you can also go down the “hand-pollination” route. For this, you need to have multiple plants, as flowers of different plants mature at different times. You can collect and store pollen in a refrigerator until the flowers of other plants bloom and are ready for pollination.
If you use seeds from your plant, don’t leave the pods on there too long, as they can burst open naturally. Cut off the flowers that you think may have produced seeds before they start to die. Leave the flowers to dry out naturally, and remove their outer layers to look for seeds.
In short, the simplest way to start seed propagation is to purchase the seeds.
Step 2: Priming Seeds for Propagation
Before the seeds are ready for germination, there are a few essential steps. Through a process called stratification, seeds are pre-treated, so they can come out of dormancy and be primed for germination.
Here are the steps to start the stratification:
- Start by shifting the seeds to an airtight container and keep them in the refrigerator for about 14 days. The temperature should be kept between 40-45 F.
- After two weeks, use a clean razor, file, or knife and gently scratch the hard seed coating.
- Soak the seeds in a cup of room-temperature water for 2-3 days. As you take the seeds out, you’ll notice they have swelled up. It is now time to move to the next step of sowing.
Step 3: Sowing
Plant the seeds 1 inch deep in a seed-starting tray. You can also use small pots, but I have found better success with trays. The soil should be well-draining and kept at a humid and warm temperature of about 75-85 F (or higher).

You can use a humidifier or mist the soil twice a day. Place the tray in indirect sunlight and seal it with a plastic bag to retain humidity. Opening the bag each day for at least an hour is essential to circulate fresh air and evaporate condensation. If you have access to a full-size or portable greenhouse, all the better.
Step 4: Transplanting
It takes about two months or longer for the seeds of a bird of paradise plant to germinate. You should then wait a few more months and let the seedlings grow before transplanting them. If you wish to grow the plant indoors, you can transplant the seedlings at this point. However, when growing outdoors, wait until the temperature outside consistently stays above 65 F. You can also optimize plant growth by planting the seeds in early fall so they can be transplanted during the growing season, i.e., spring.
Bonus Tips for Seed Propagation
- Bird of paradise seeds are very particular about the growing environment for successful germination. Ensure that they get ample indirect sunlight, high humidity, and a temperature of at least 75 F.
- USDA hardiness zones 10-12 are ideal for growing a bird of paradise plant. Zone 9 can maintain a Strelitzia plant in summer, but when temperatures drop, you must bring it inside.
- Bird of seed plant will require special care and attention even after it has sprouted. It will ensure that the plant reaches maturity without any issues.
Conclusion: How to Choose Between Seed and Division Propagation?
It is natural to have a hard time deciding between the best bird of paradise propagation method. However, propagation by division is undoubtedly the most preferred and easiest method.
It produces fast and reliable results and only requires a little gardening experience. On the other hand, seed alone can take two months to germinate, apart from requiring perfect conditions and lots of attention. Even after germination, the plant will take several years to become mature. You can expect your bird of paradise plant to bloom in about ten years if you’re using a seed propagation method.

But that is not the only reason I lean towards and recommend propagation by division. A bird of paradise plant that is propagated using division will have the exact properties and qualities of the parent plant. On the other hand, seeds are rarely a good candidate if you want to replicate the parent plant.
That is not to say I am entirely against seed propagation. A bird of paradise plant must be healthy and mature to be fit for division. Furthermore, division propagation is that it reduces the size of the parent plant. This may change the foliage-rich appearance of the parent plant you’re used to.
Ultimately, it comes down to preference, your gardening skills, and how much time, attention, and resources you can devote to caring for a plant. Regardless of the method you choose, both have been used successfully for propagating bird of paradise plants.
Frequently Asked Questions (FAQ)
How to propagate a bird of paradise in water?
It is impossible to propagate a bird of paradise plant in water, as it doesn’t grow from stem or leaf cuttings. There are only two ways to propagate this plant, and they are through rhizome division or seeds.
Is it possible to propagate a bird of paradise plant without roots?
The chances of successful propagation of a bird of paradise plant without roots are slim. The best way is to choose a rhizome division with noticeable root and stem growth. This method of propagation is called propagation by division.
Does a bird of paradise plant need misting?
Humidity is one of the most important considerations for keeping your bird of paradise plant healthy. Apart from regular watering, the plant needs misting to keep the humidity high. Just make sure that the soil is moist but never wet or soggy, or the plant will experience fungal infections and root rot. You can also use a humidifier to maintain the ideal humidity levels around your Strelitzia plant.
What is the most common pest in a bird of paradise plant?
Opogona Crown Borers are the most common insects that attack a bird of paradise plant. For this reason, they are also often considered its archnemesis.
Is the bird of paradise plant toxic to cats and dogs?
Even though Strelitzia is mildly toxic to humans, it can seriously harm cats and dogs.